Join a Room
With your room created and participants invited, it's time to join the meeting. This guide will walk you through the process of joining a room, setting up your audio and video, and interacting with other participants.
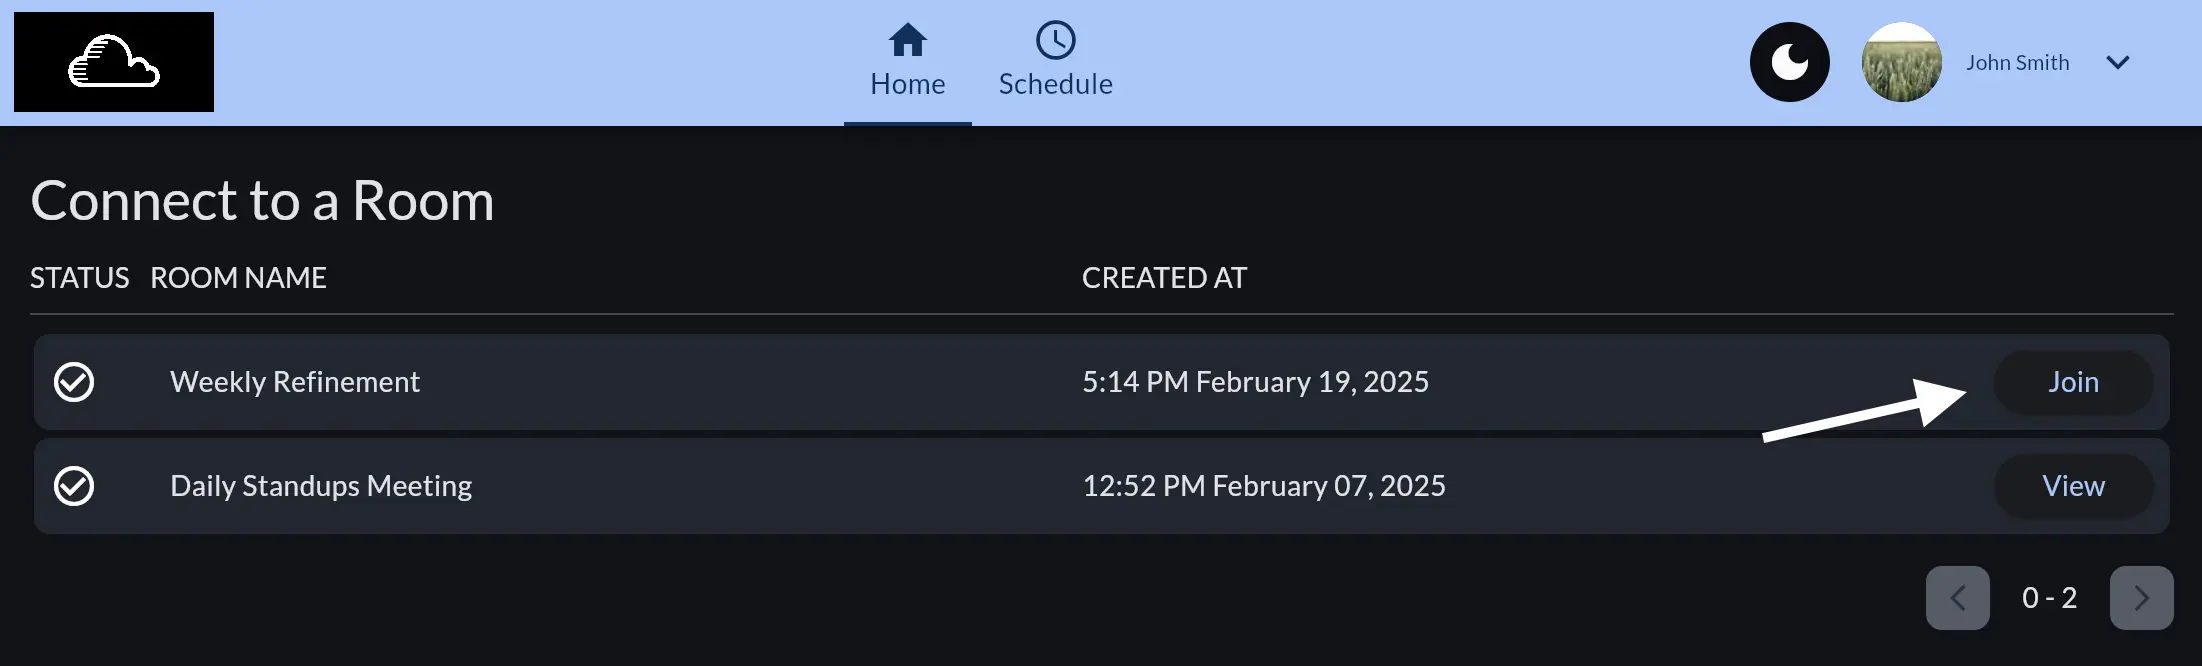
Locate the Join Button
There are two ways to join from the Hylist app:
- Start by navigating to the home page on Hylist. Then click the Join button from the room list corresponding to your desired room.
If you don't see this button and instead see a View button, then your room has expired and is no longer joinable. This expiration can be configured inside Hylist, but for demoing purposes, rooms automatically expire 24 hours from the time they are created.
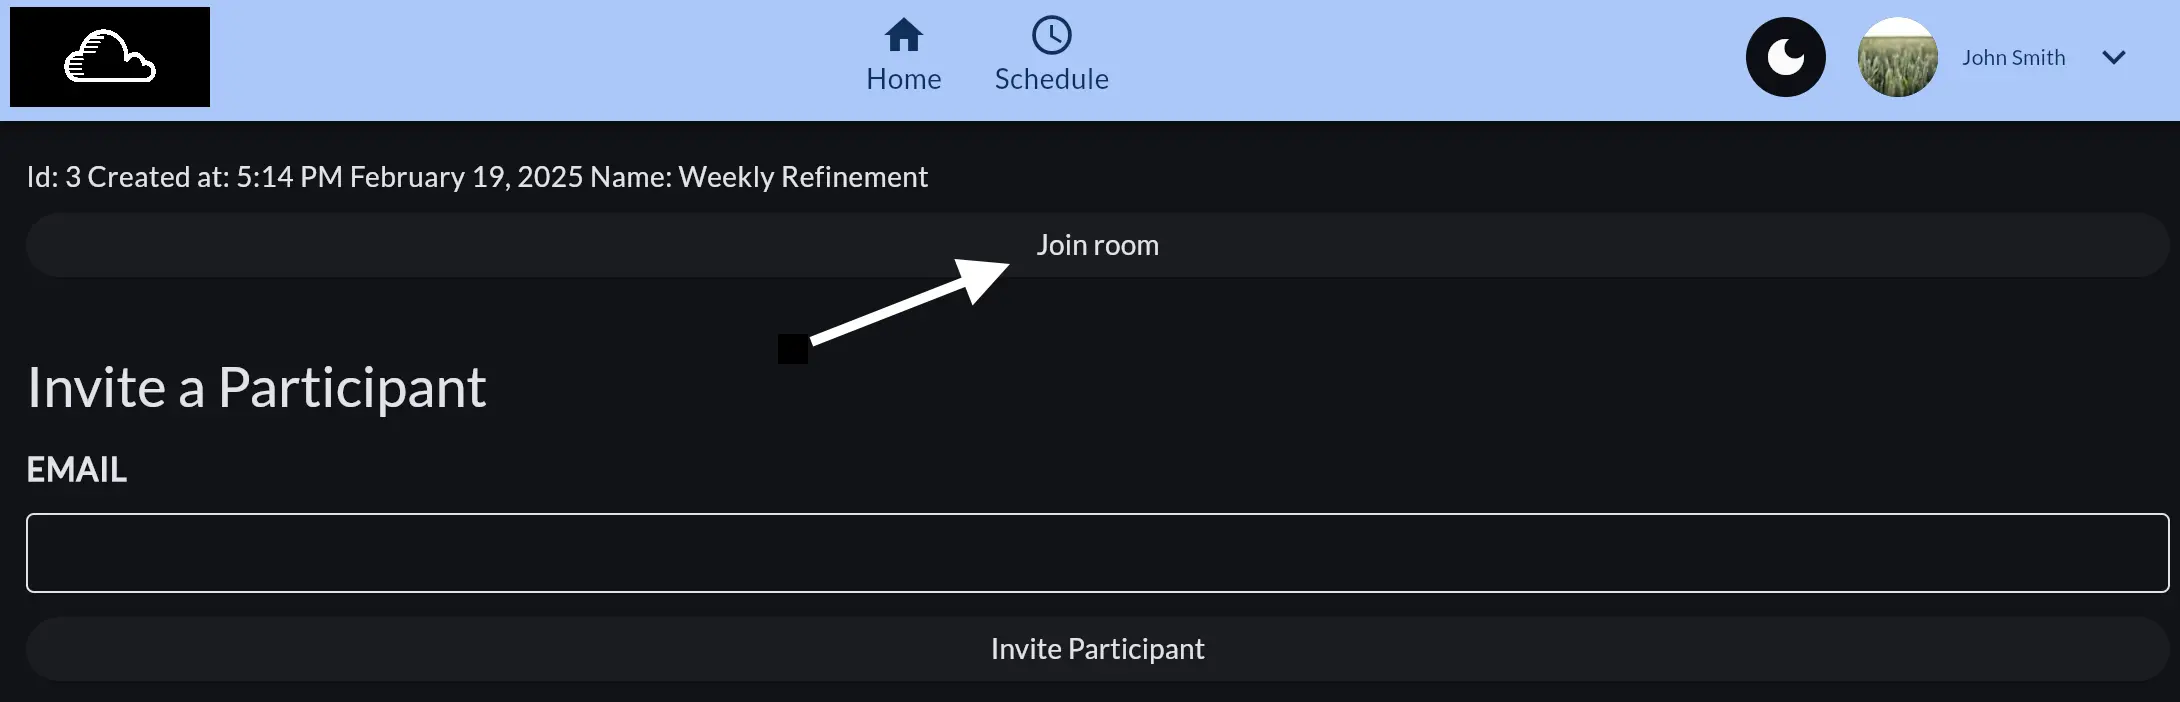
- Navigate to the room details page for your room. For example https://hylist.app/room/3. This is a demo URL! You won't be able to access this page. Then, click the Join button near the top of the page.
If you don't see this button and instead see a Room expired button, then your room has expired and is no longer joinable.
Join Directly with a Link
If you have a direct link to the room, you can paste it into your browser's address bar to join the room directly. For example, https://hylist.app/room/3/meeting. If you are joining as a guest from a shared invite link, your invite link may look a little different. The url will include an encoded password for the room, so you can securely access it.
What About Uninvited Parties?
If a user attempts to join a room without an invite or a valid password-encoded url, they will not be allowed to join. They also cannot access any of the recordings, transcripts, or room data. This keeps your conferences secure and private.
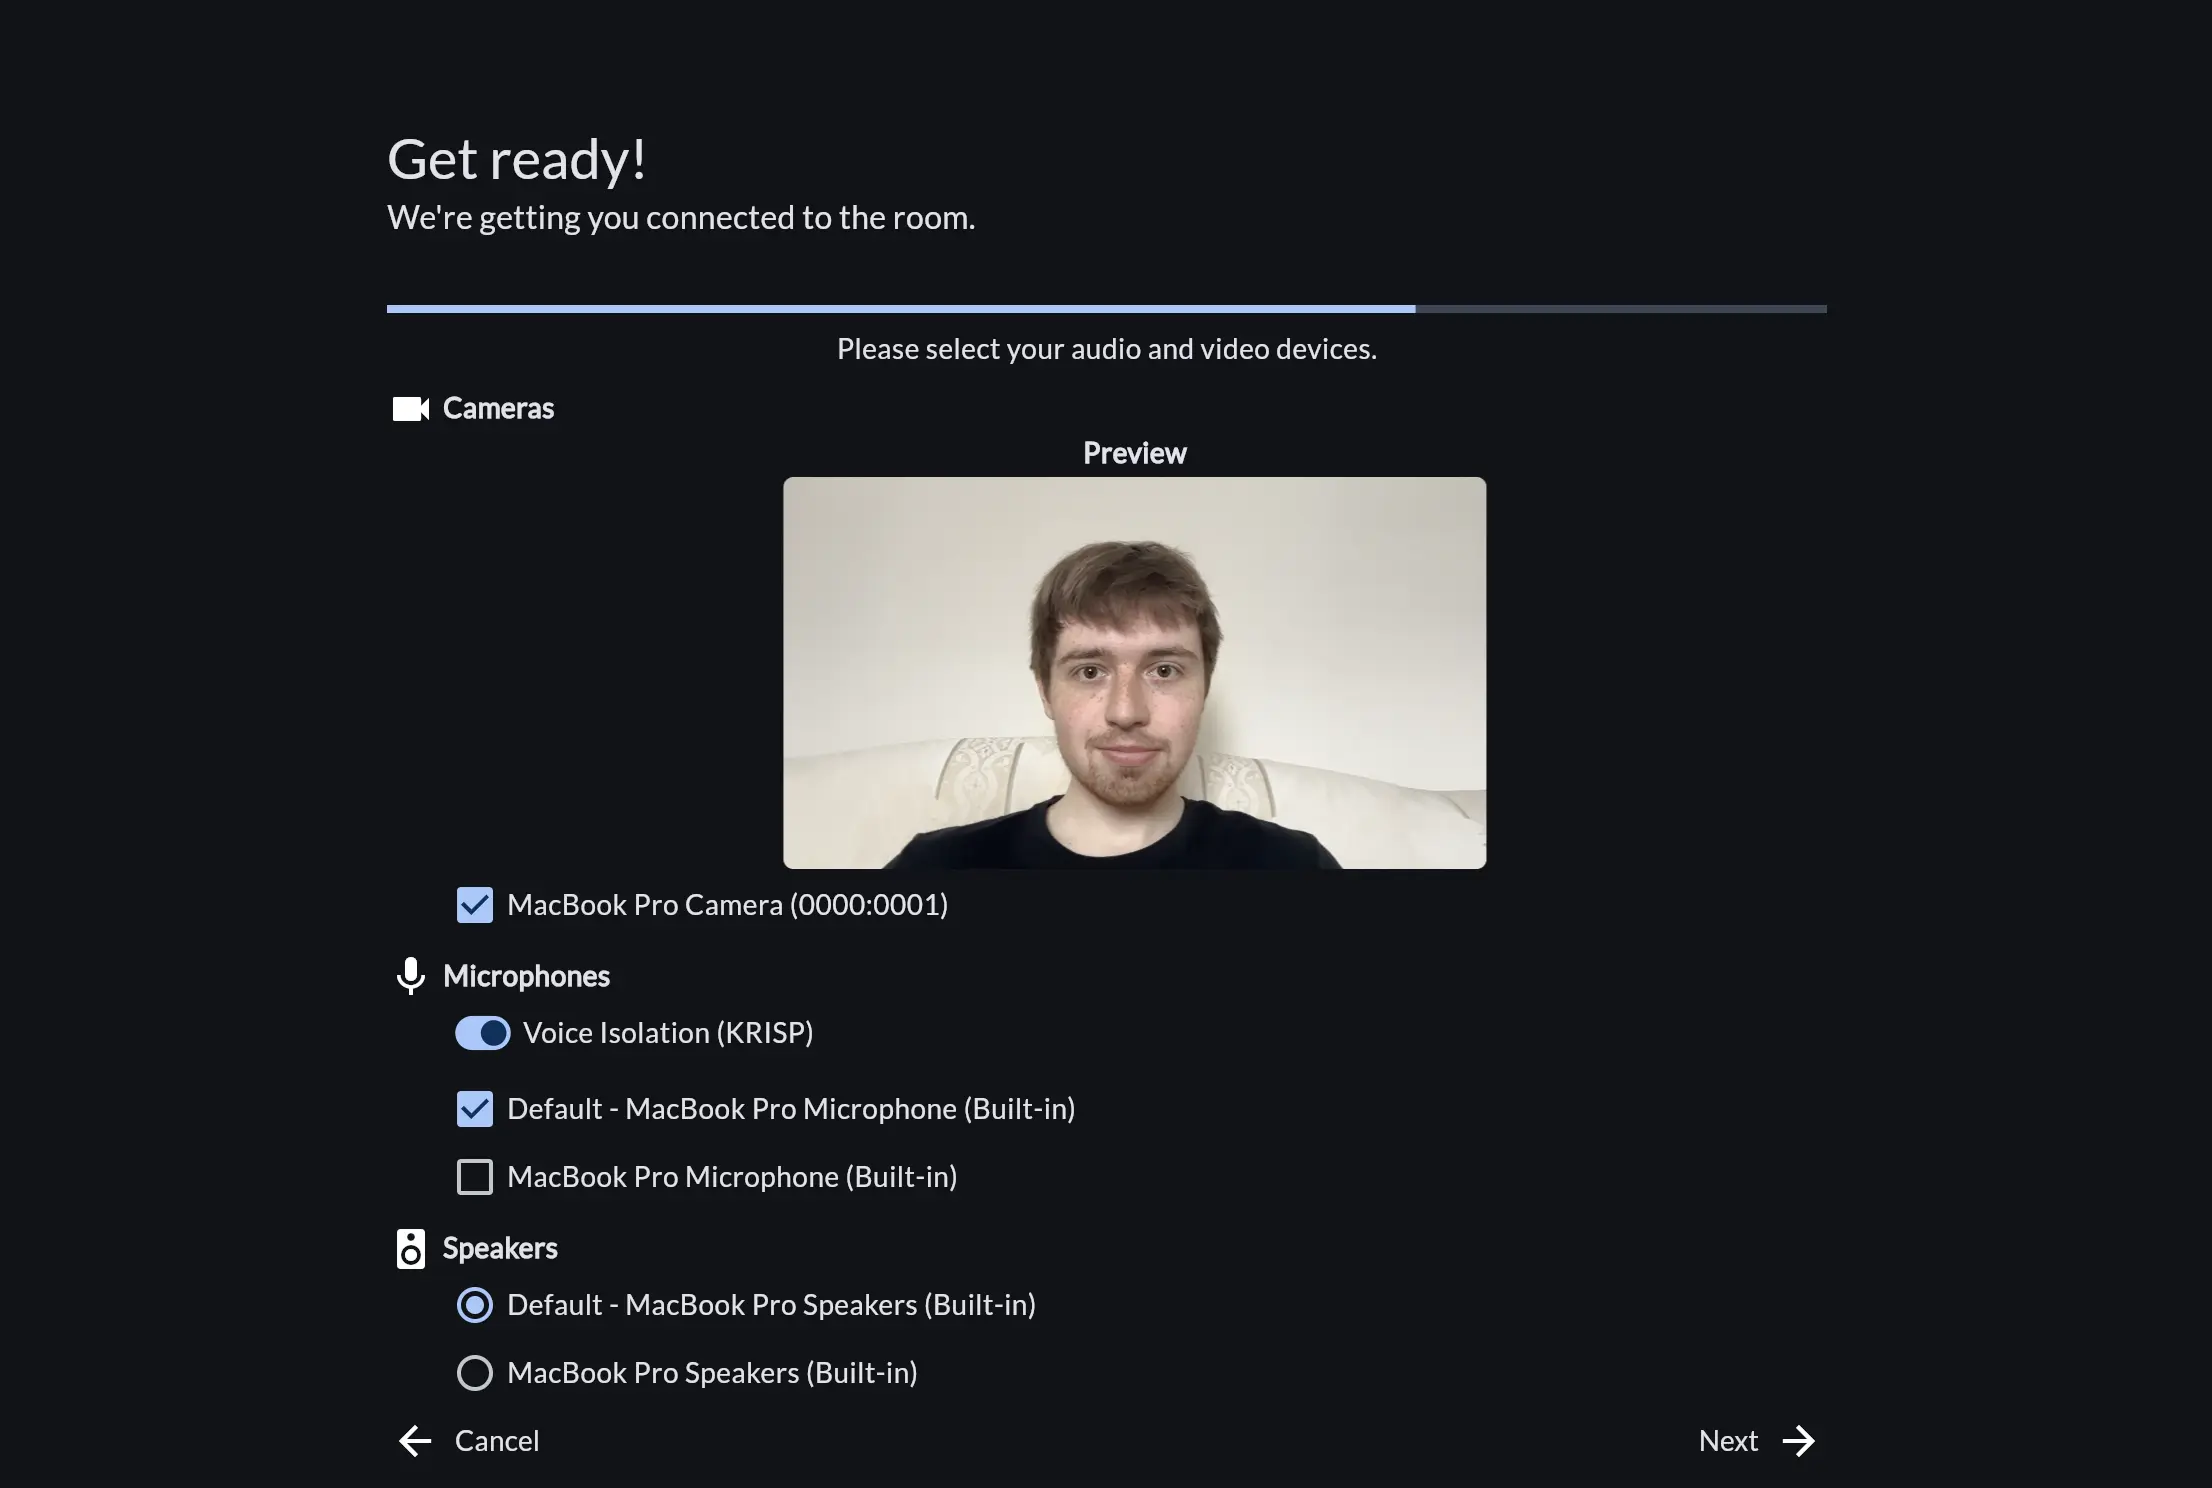
Select Audio and Video Devices
The first time you join a Hylist room, you will be prompted to grant permissions to access your camera and microphone. Click Allow to then select your desired audio and video devices. If you click Deny, you will be unable to interact with the room through voice and video until permissions are granted.

If you have multiple devices connected to your computer, you can choose which ones to use for your meeting. If you don't see your device listed, make sure it is connected and turned on. This preview page will show you a live feed of your selected devices so you can verify they are working correctly. Your audio and video isn't sent to other participants until you click the Next, so take a moment to get ready!
Unlike most video conferencing software, Hylist supports publishing the data from multiple connected camera and microphone devices into the room. This is super useful if you desire multiple camera angles or audio sources.
For example, think about a virtual classroom experience. You could have a camera pointed at a whiteboard, another camera pointed at the instructor, a microphone on the instructor's vest, and another microphone picking up students' voices in the gallery. All of these devices can be connected to a single computer running Hylist, and all of them can be published into the room for virtual attendees to see and hear.
Krisp AI Noise Suppression
Optionally, you can also enable Krisp for AI-powered voice isolation. Krisp is a third-party service that uses machine learning to remove background noise from your audio. This is done on-device, and no audio data is collected by KRISP. Enable this option if you are in a noisy environment or just want to isolate your voice. Sounds like keyboards clicking, dogs barking, babies crying, loud snacking, or just general background noise will be removed from your audio feed.
Connecting into the Room
With your desired devices selected, click the Next button to join the video conference. Afterwards, explore the in-meeting features you can use to interact with other participants and the room itself.